The Vibe Coding Block lets you go beyond Softr’s standard blocks to build fully custom interfaces — all from a prompt. By isolating AI code generation to individual UI blocks, Vibe Coding acts as the ultimate extension layer and safety net. You get the limitless flexibility of “vibe coding” without the risk of breaking your app’s global security or core infrastructure. Connect it to your live data, add CRUD actions, and create personalized experiences to move beyond generated prototypes into bespoke production apps. Build and iterate confidently with version history built in, and make simple text and image edits directly without re-prompting.Documentation Index
Fetch the complete documentation index at: https://docs.softr.io/llms.txt
Use this file to discover all available pages before exploring further.
What can you build?
Client dashboards, booking tools, progress trackers, calculators, notification feeds, partner portals, and more. Check out the videos below for examples.Step-by-step: Using the Vibe Coding Block
1. Add the Vibe Coding Block and enter your prompt
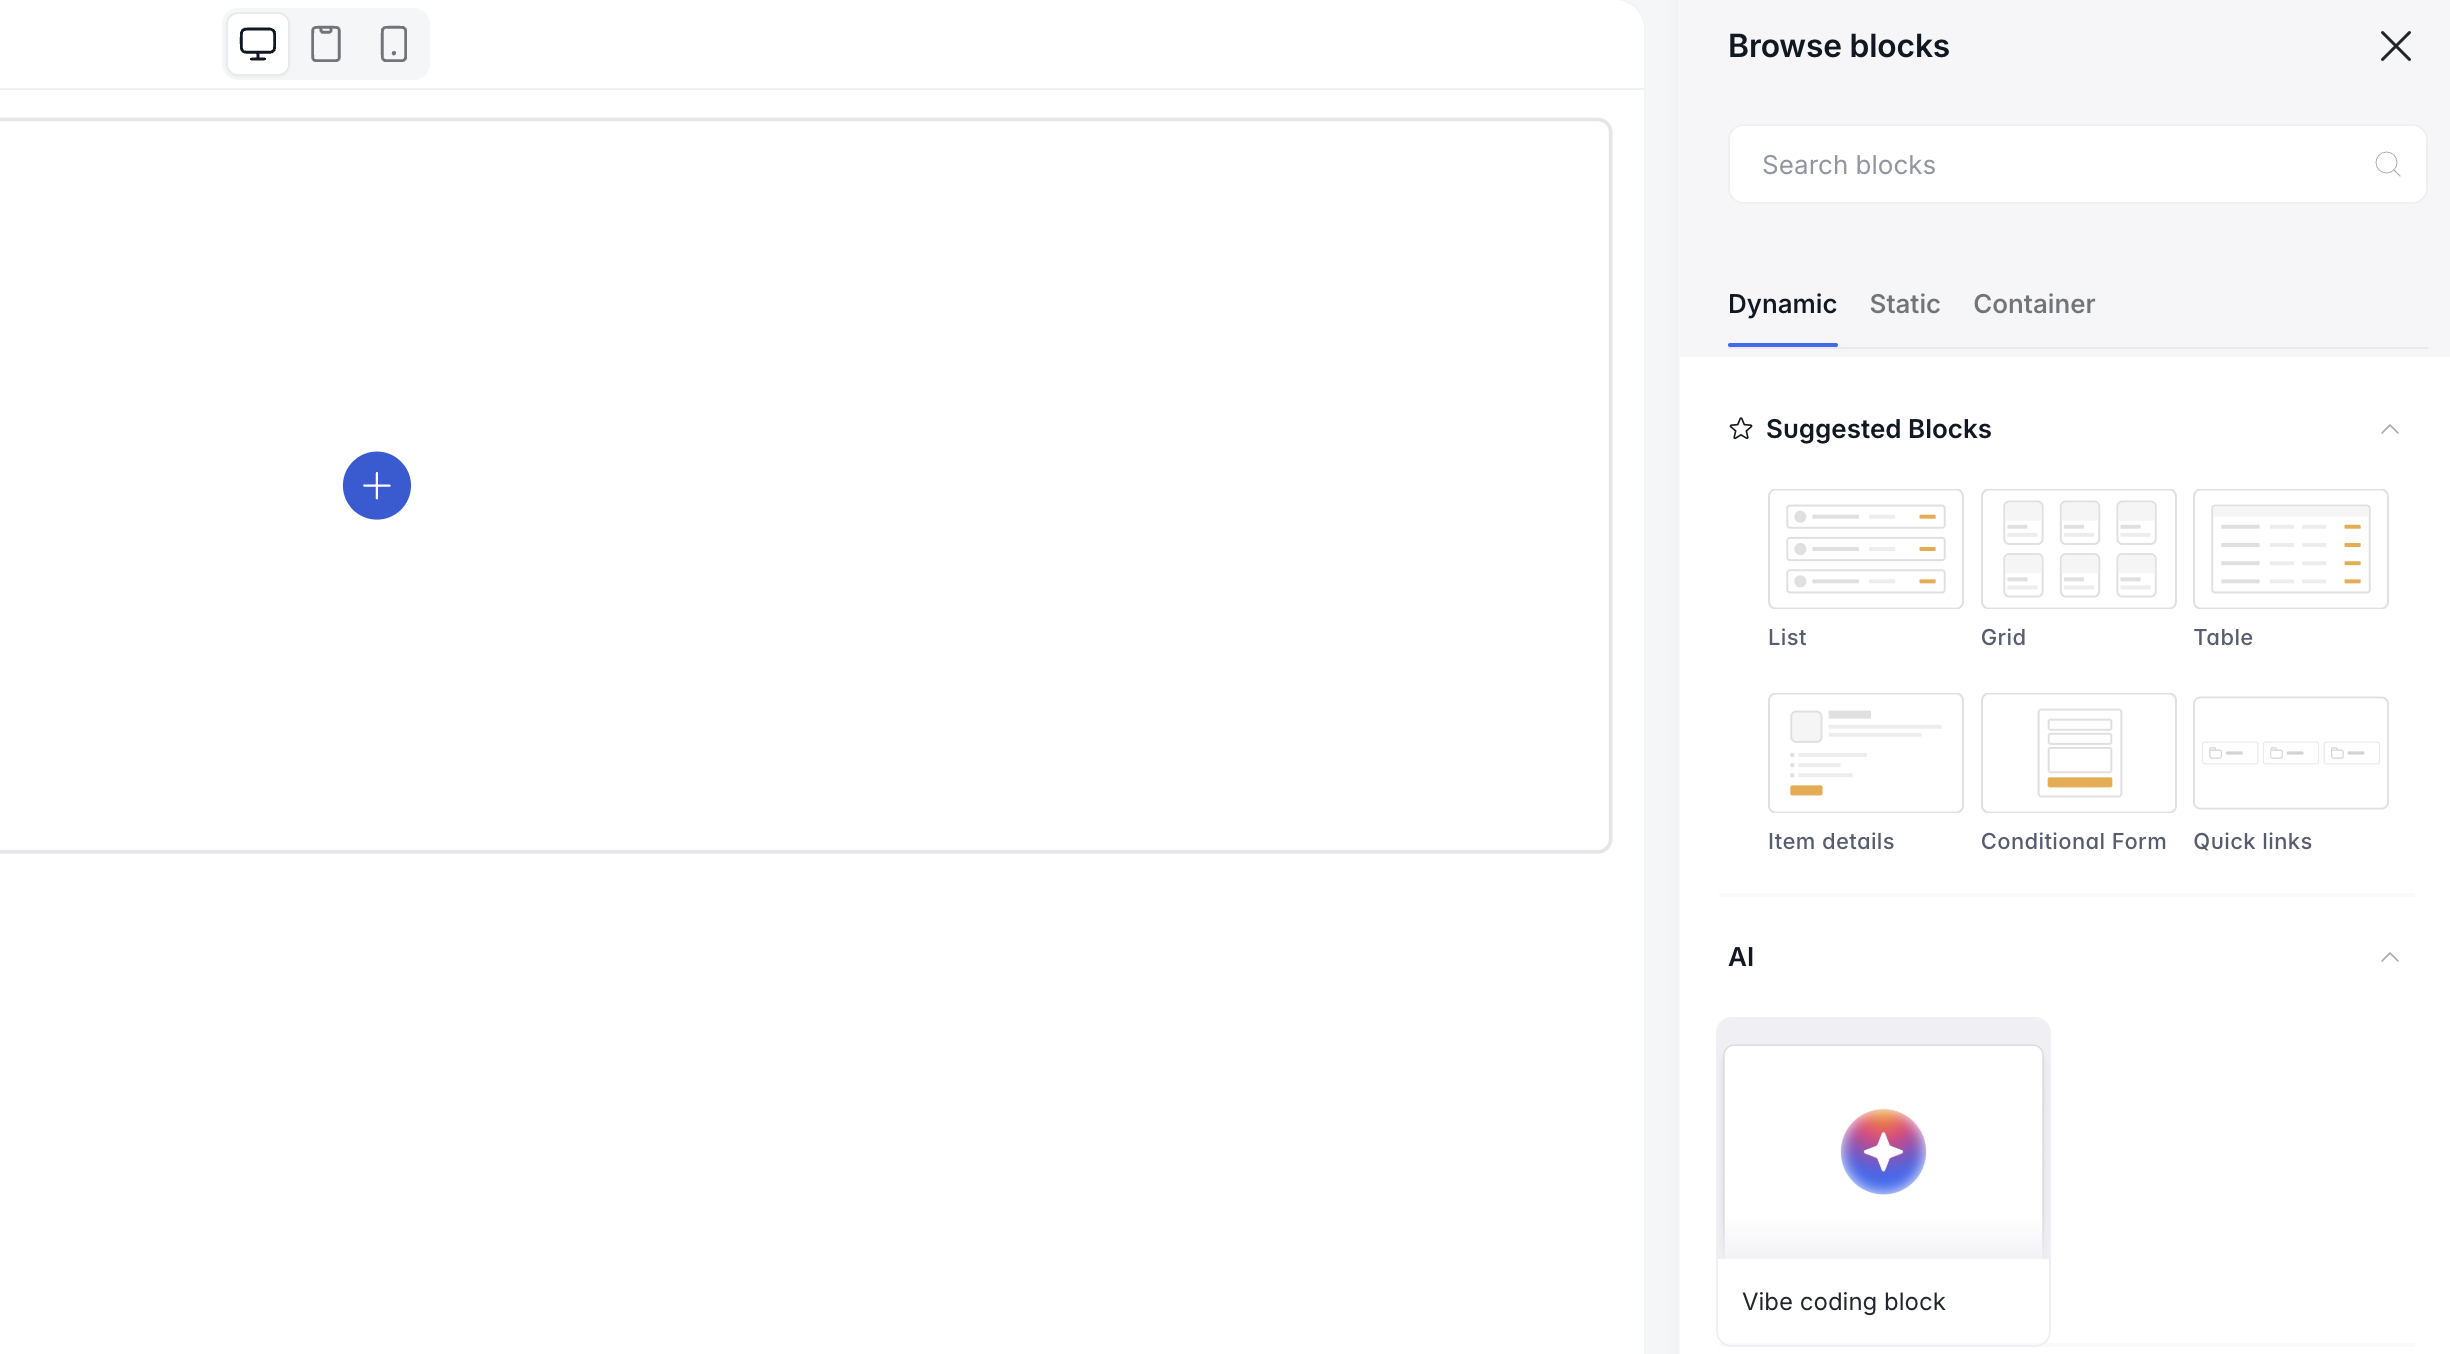
Open your Softr app, click Add block, then select AI → Vibe Coding Block. In the chat, describe what you want to build in plain English. The Vibe Coding Block supports both static and data-connected blocks. For example:- A static layout like a page header, pricing table, or content section
- A dynamic, data-connected block like a dashboard, booking tool, or admin view that pulls from live data
2. Connect a data source (optional)
If you want your block to dynamically display live data, go to the Source tab and connect a data source (Database + Table). You can also add conditional filters here. The Vibe Coding Block supports Softr Databases and 15+ external data sources, including Airtable, Google Sheets, Notion, HubSpot, SQL, and more.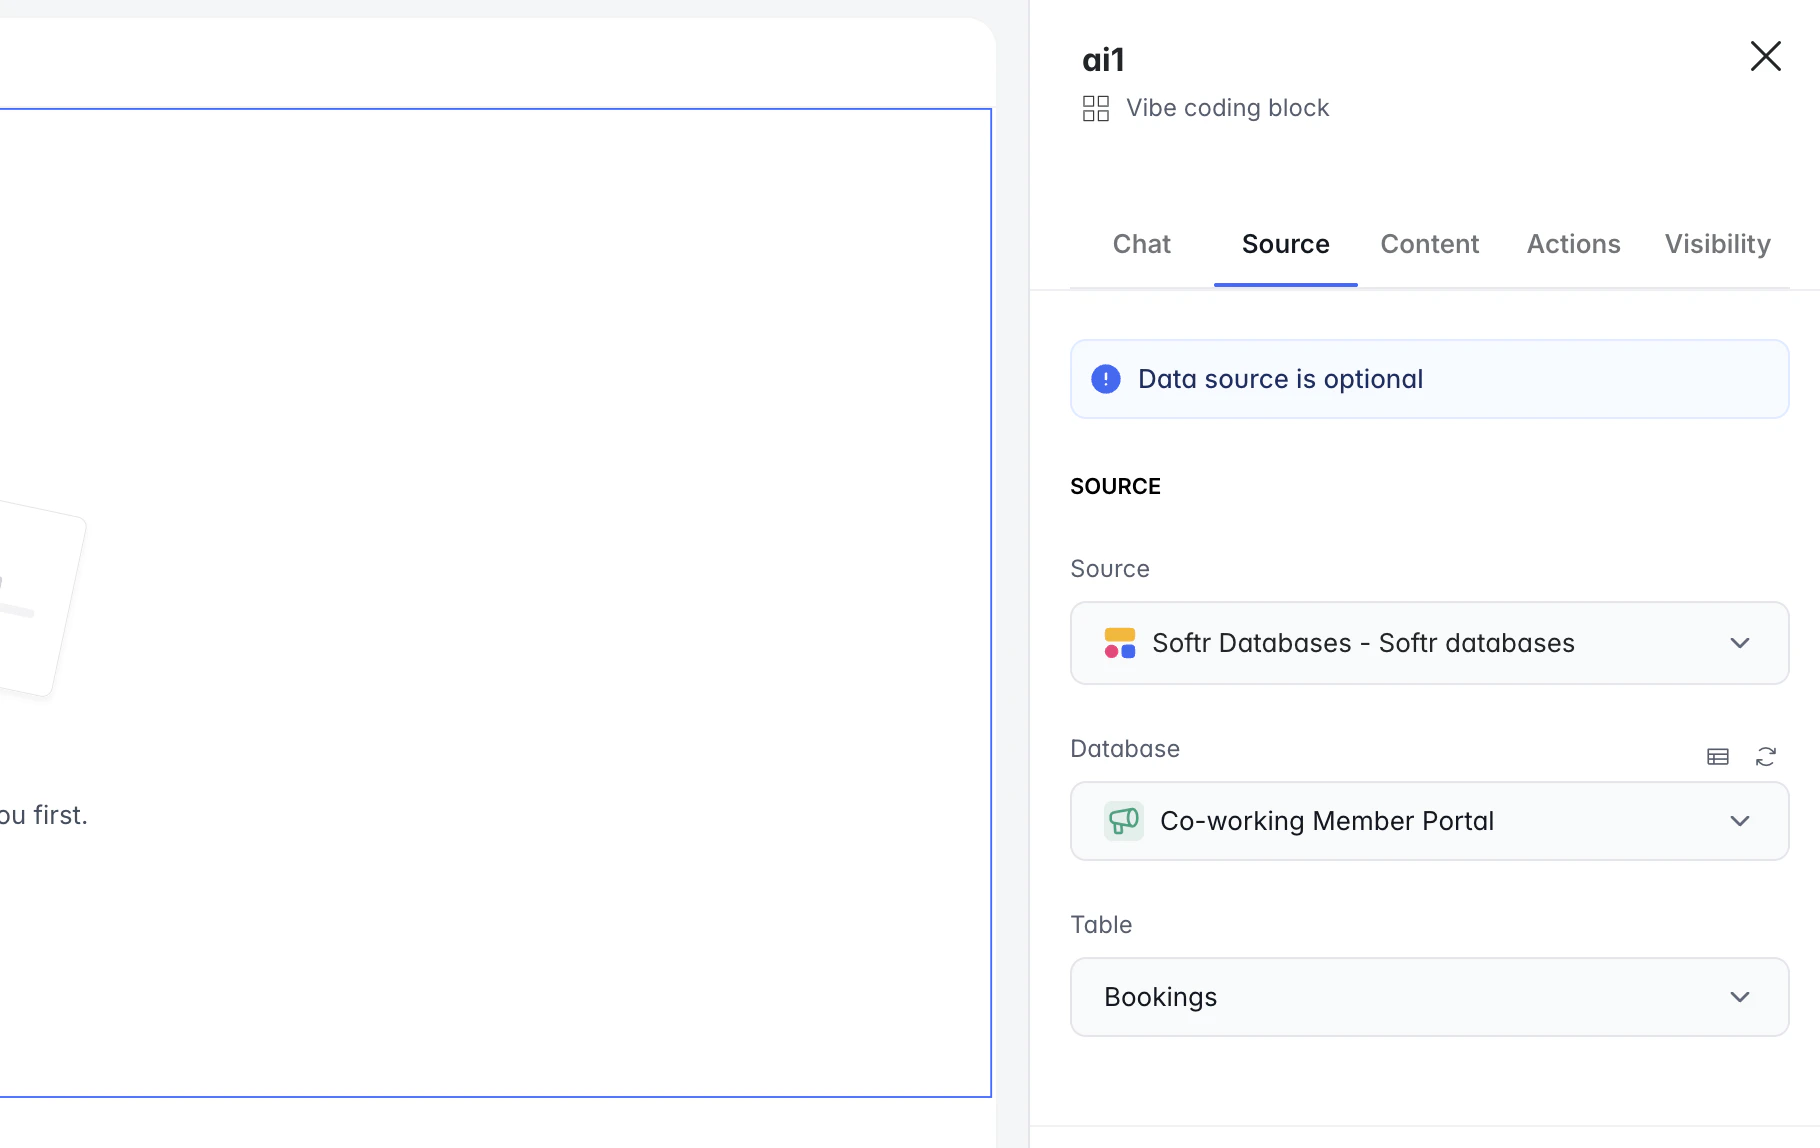
3. Add and configure CRUD and other actions (optional)
You can prompt the AI to add action buttons, such as:- Create/add records
- Edit/update records
- Delete records
- Ask AI
- Go to the Actions tab in the vibe coding block
- Review each action and configure permissions, conditions, or connected workflows as needed
4. Control visibility and access
Use the Visibility tab to control which user groups can see the block. You can also set conditional filters in the Source tab.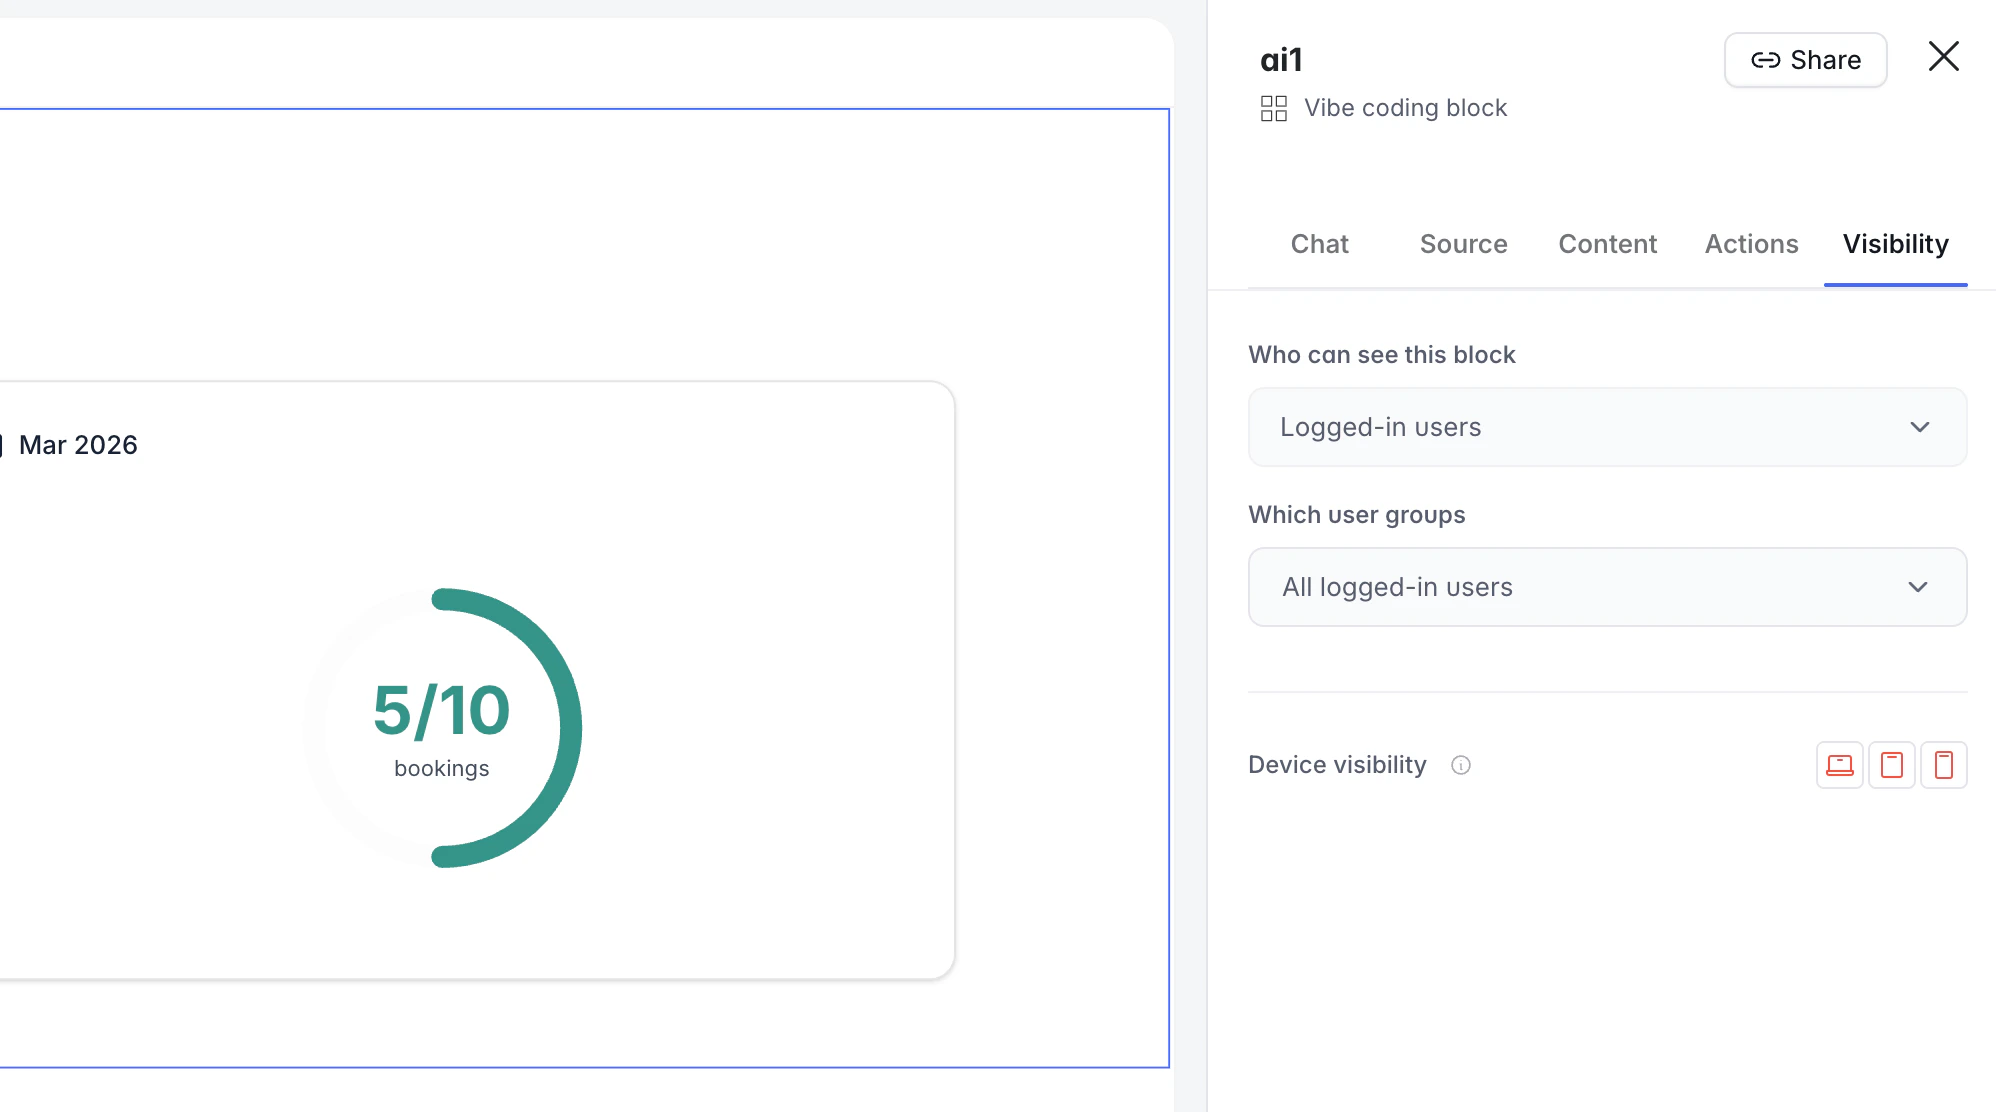
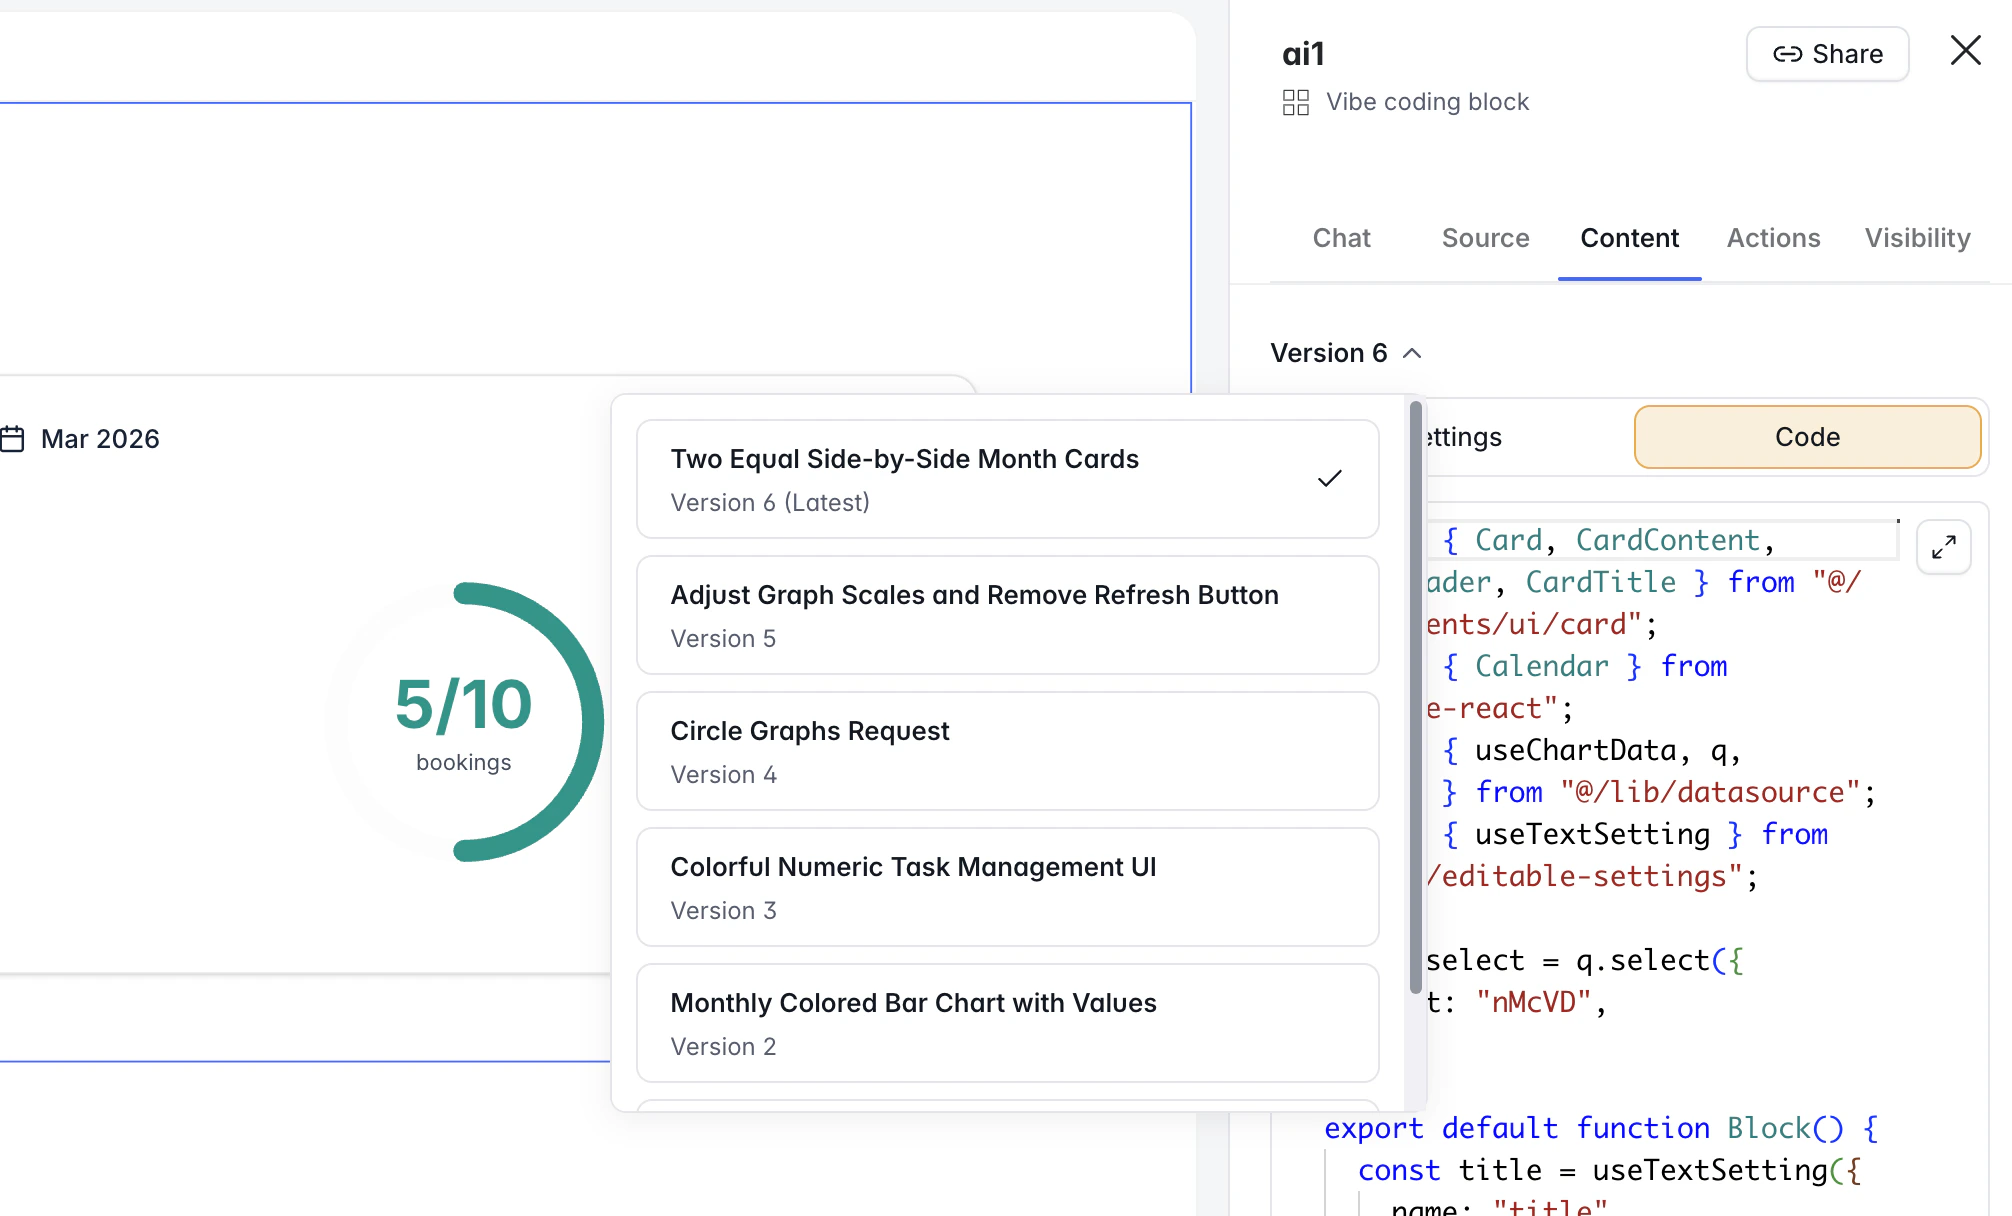
Managing version history
Each time you re-prompt the block, Softr saves a new version. This lets you experiment without losing earlier work.Using Undo
For quick corrections, you can use the Undo button located directly in the AI chat on the last message. Clicking Undo instantly reverts the block to its immediate previous state.Reverting and duplicating versions
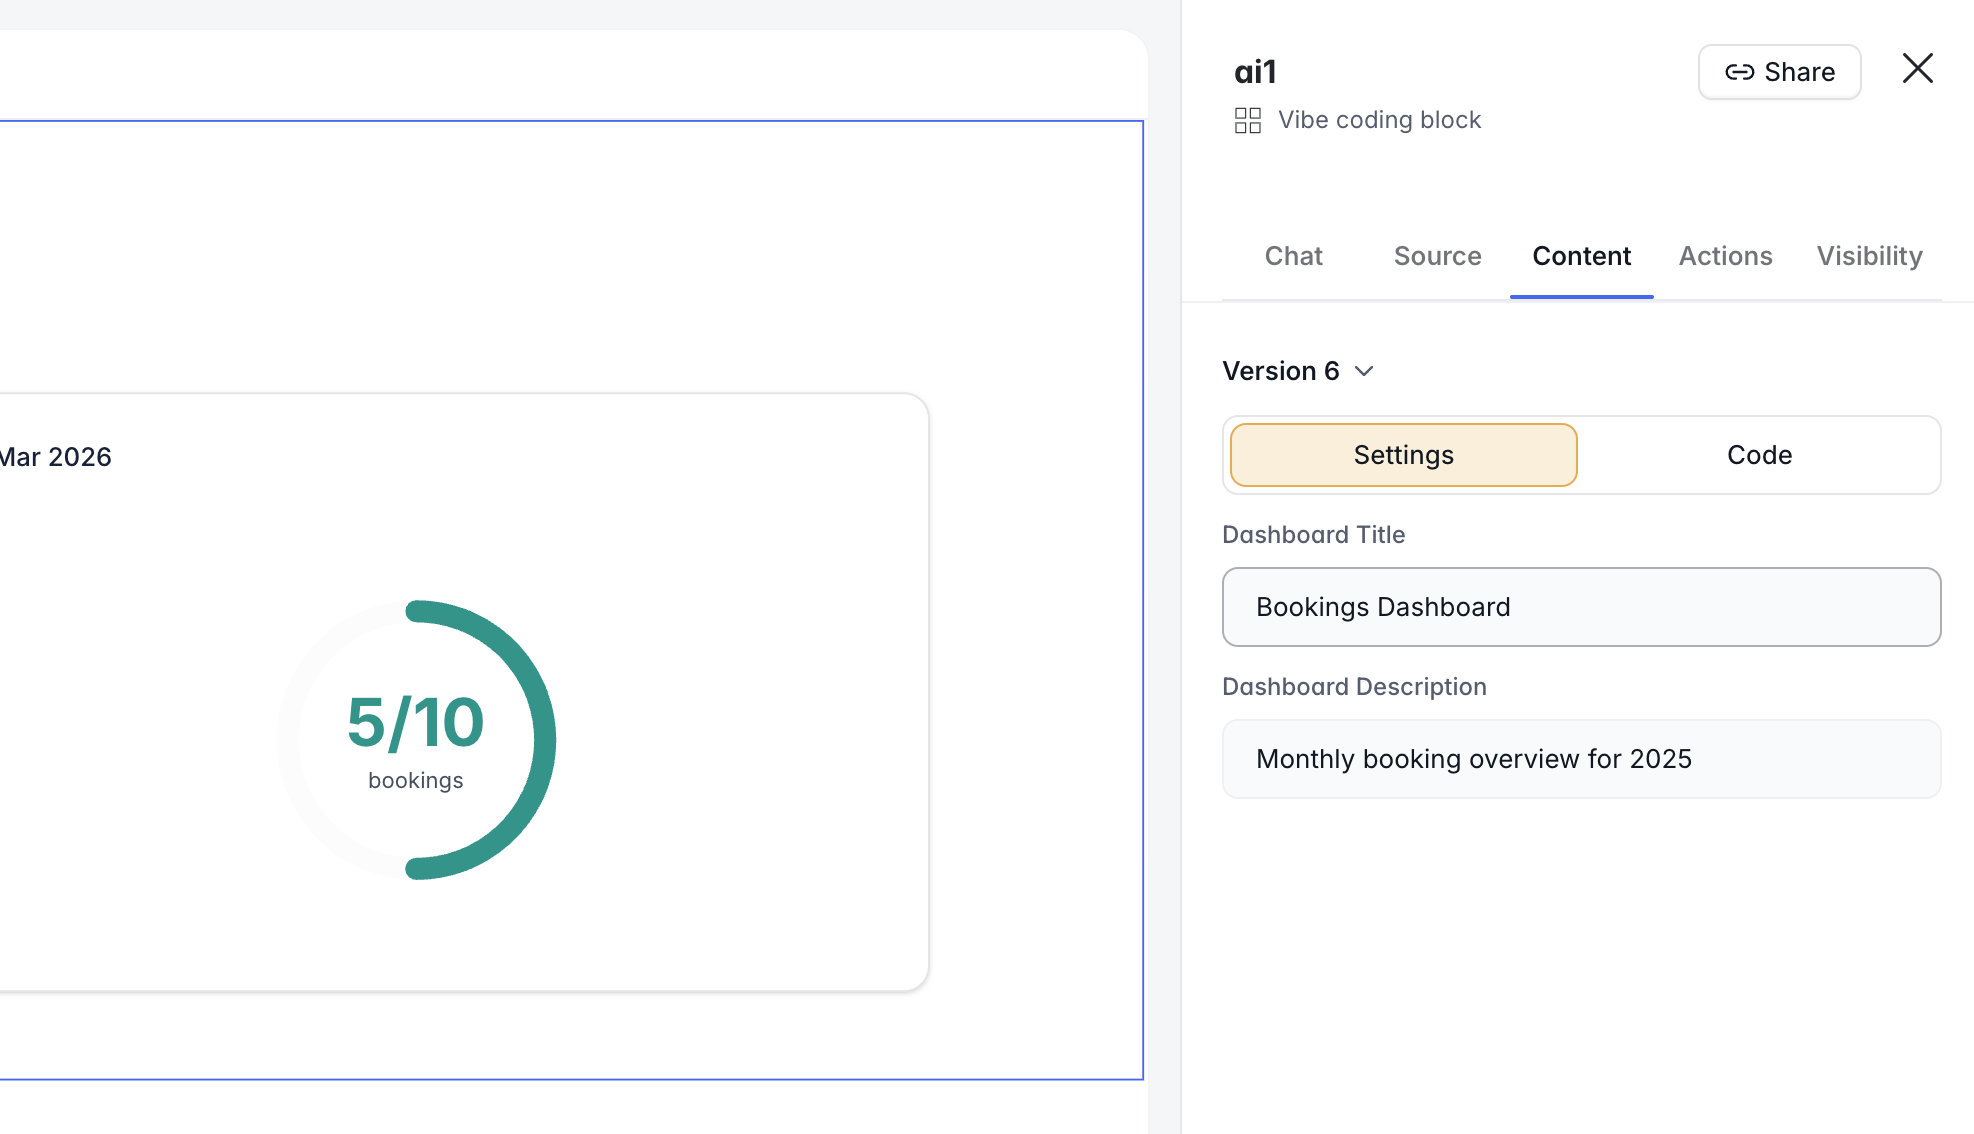
To view or revert to any previous version:- Open the Content tab
- Use the version dropdown at the top of the tab
- Select a previous version and click Restore to revert (or Duplicate as new to duplicate the block)
Editing text in the vibe-coded block
From the Content tab, go to Settings to edit text fields directly — for example, hero text, testimonials, or images. This option appears when the AI has generated editable text fields in your block.